Implementing 802.11 with Microcontrollers: Wireless Networking for Embedded Systems Designers

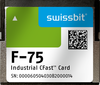
Together we've covered quite a bit of ground to get to this point. However, that 802.11b CompactFlash NIC's Link LED is still flashing telling us that we're still shy of our goal of actively participating in a wireless LAN. Here's a list of what we have accomplished thus far:
Power up and initialize the AirDrop USART.
Initialize the CompactFlash NIC.
Configure the CompactFlash NIC for BSS operation.
Configure the CompactFlash NIC's desired SSID.
Configure the CompactFlash NIC's maximum frame body data length.
Configure the CompactFlash NIC's transmission rates.
Retrieve and format the CompactFlash NIC's MAC address.
Format the AirDrop IP address.
These are the tasks we will accomplish in this chapter:
Allocate 802.11b NIC transmit buffers.
Enable the 802.11b CompactFlash NIC's MAC.
Probe requests will be transmitted by the 802.11b NIC.
The AP will acknowledge the 802.11b NIC's Probe request.
The 802.11b NIC will request Authentication.
The AP will Authenticate the 802.11b NIC.
The 802.11b NIC will request Association.
The AP will grant the 802.11b NIC's association request.
The AirDrop will join the AIRDROP_NETWORK wireless LAN.
The number 9 is 9, whether it's represented in binary (0b00001001) or hexadecimal (0x09). It looks like we have 9 more combat missions to fly before we can get that solid Link LED on our 802.11b CompactFlash NIC, which signifies that we're on the air and actively participating in a wireless LAN.
To allocate transmit buffers within out AirDrop 802.11b CompactFlash NIC, we must add yet...