Monitoring and Managing Microsoft Exchange 2000 Server
Presents best practices and innovative everyday techniques for running Exchange Server for Windows 2000.
 TABLE OF CONTENTS
 You can create a Routing Group Connector using the following procedure:
Start the System Manager from the Windows 2000 Start menu by selecting Programs Microsoft Exchange System Manager.
| Note | By default, administrative groups and routing groups are not displayed. If you have not already enabled these, right-click on the Exchange organization and select Properties to display the organization properties. Select the Display administrative groups check box to allow the administrative groups to be displayed and select the Display routing groups check box to display the routing groups. You must restart the Exchange System Manager after enabling display of administrative groups and routing groups. |
Expand the Administrative Groups section.
Expand the administrative group (e.g., First Administrative Group) that contains the routing group where you want to add a connector.
Expand the Routing Groups section.
Expand the routing group where you want to add the connector.
Right-click on the Connectors section, and select New Routing Group Connector.
On the General tab, enter a name for the new Routing Group Connector (Figure 6.13). You should use a descriptive name that helps identify the two routing groups being connected (i.e., Dallas St. Louis Routing Group Connector).
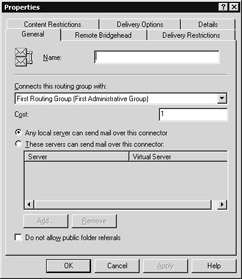
Figure 6.13: The General tab
In the Connects this routing group with drop-down list, select the target routing group.
In the Cost field, enter a logical connection cost between 1 and 100. A logical cost value is associated with each connector between...