AutoCAD Pocket Reference, 2008 Edition

Section 4: Drawing Entities

ARC

TYPING = A

PULLDOWNS = DRAW / ARC

TOOLBARS =DRAW

There are 10 ways to draw an ARC in AutoCAD. Not all of the ARCS options are easy to create so you may find it is often easier to trim a Circle or use the Fillet command.

On the job, you will probably only use 2 of these methods. Which 2 will depend on the application.

An ARC is a segment of a circle and must be less than 360 degrees.

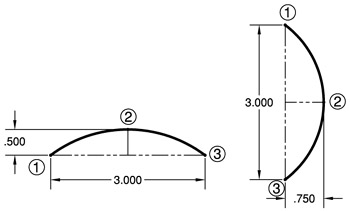
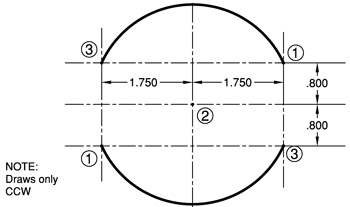
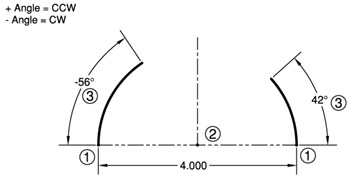
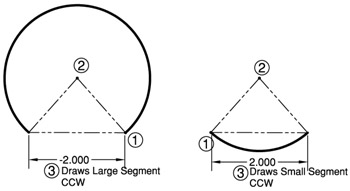
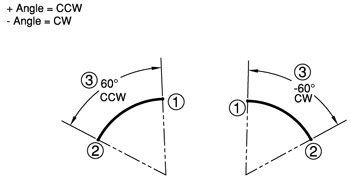
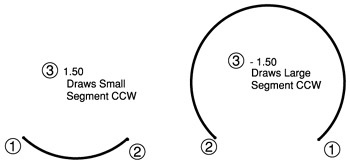
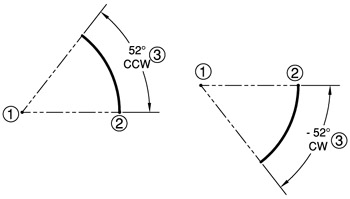
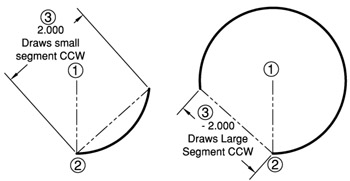
Most ARCS are drawn counter-clockwise but you will notice in the examples on the following pages that some may be drawn clockwise by entering a negative input.

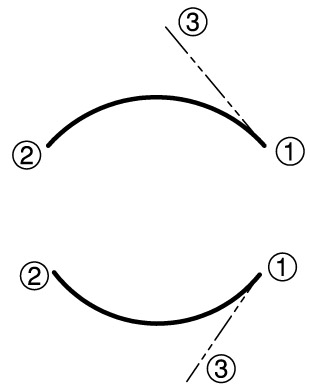
Examples of each of the ARC options are shown on the following pages.

Also, refer to the "Help" menu for additional examples of the use of the Arc command.

3 PONT

START, CENTER, END

START, CENTER, ANGLE

START, CENTER, LENGTH

START, END, ANGLE

START, END, DIR

START, END, RADIUS

CENTER, START, END

CENTER, START, ANGLE

CENTER, START, LENGTH

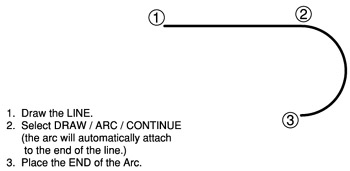
CONTINUE

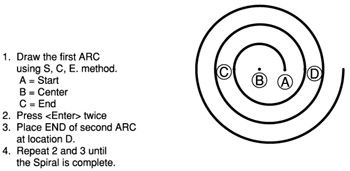
DRAWING A SPIRAL

BLOCKS

A BLOCK is a group of objects that have been converted into ONE object. A Symbol, such as a transistor, bathroom fixture, window, screw or tree, is a typical application for the block command. First a BLOCK must be created. Then it can be INSERTED into the drawing. An inserted Block uses less file space than a set of objects copied.

CREATING A BLOCK
  1. First draw the objects that will be converted into...

UNLIMITED FREE
ACCESS
TO THE WORLD'S BEST IDEAS

SUBMIT
Already a GlobalSpec user? Log in.

This is embarrasing...

An error occurred while processing the form. Please try again in a few minutes.

Customize Your GlobalSpec Experience

Category: Wire Drawing Dies
Finish!
Privacy Policy

This is embarrasing...

An error occurred while processing the form. Please try again in a few minutes.