Learning and Applying Autodesk Inventor 2008 Step-by-Step
Objectives:
Learn to use the Sweep command
Learn to use the Loft command
Learn to use the Coil command
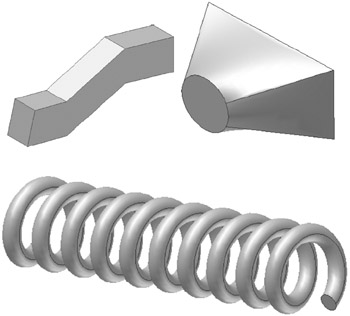
Chapter 9 includes instruction on how to design the parts shown below.

Start Inventor by referring to "Chapter 1 Getting Started".
After Inventor is running, begin a New Sketch.
Move the cursor to the upper left portion of the screen and left click on Line as shown in Figure 1.
Move the cursor to the center of the screen and left click once. Ensure that the yellow dot appears on the intersection of the darkened grid lines as shown in Figure 2.
Move the cursor to the left portion of the screen and left click once as shown in Figure 3. Right click anywhere on the screen. A pop up menu will appear. Left click on Done.
Move the cursor to the upper left portion of the screen and left click on Two Point Rectangle as shown in Figure 4.
Move the cursor to the center of the grid and left click once as shown in Figure 5. Move the cursor to the upper right portion of the screen and left click once. Complete the sketch shown in Figure 5. After the sketch has been dimensioned, delete the horizontal line that was drawn first. Right click anywhere on the screen. A pop up menu will appear. Left click on Done.
Right click anywhere on the screen. A pop up menu will appear. Left click Finish Sketch