Introducing Revit Architecture 2009

Floors, Roofs, and Ceilings

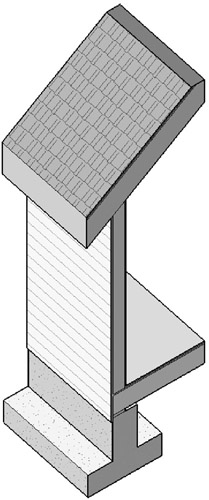
Floors, roofs, and ceilings are similar to walls in that they're built of layers of materials and are constrained to levels. The interface for creating and editing layers of construction is nearly identical, as you'll see in this chapter's exercises. Floors and roofs also use the same material layer routing as walls, making connections between walls, floors, and roofs appear correctly (shown in Figure 4.11).


Figure 4.11: Walls join with floors and roofs

Creating Floors, Roofs, and Ceilings

These tools can be accessed from either the Basics or Modeling tab in the Design bar. All of these elements are sketch-based elements in that they are made by first defining a 2D boundary in the Sketch Editor. When you activate these tools, the Design bar is replaced with a set of tools specific to sketching 2D shapes. In this mode, you draw lines that represent the extent of the element as if it were projected onto a 2D plane. When you draw a closed loop of lines and finish the sketch, Revit generates 3D geometry for you.

In the case of floors, the geometry is coplanar with the sketch and has a predictable outcome. With more complex forms, such as hipped roof configurations, the resulting geometry is less obvious from within the Sketch mode. Nonetheless, the underlying 2D sketch is always just a click away and can be easily manipulated to achieve your design objectives. To change the shape of an already created floor, roof, or ceiling,...

UNLIMITED FREE
ACCESS
TO THE WORLD'S BEST IDEAS

SUBMIT
Already a GlobalSpec user? Log in.

This is embarrasing...

An error occurred while processing the form. Please try again in a few minutes.

Customize Your GlobalSpec Experience

Category: Sealers and Seal Coatings
Finish!
Privacy Policy

This is embarrasing...

An error occurred while processing the form. Please try again in a few minutes.