Apple Aperture 2: A Workflow Guide for Digital Photographers
Including clear explanations and step-by-step guidance, this book shows you the best way to import, organize and enhance your images for ease of management and high quality results.
 TABLE OF CONTENTS
 Aperture is a great saver of screen space. However, it really flourishes when given room to breathe, and the ideal Aperture set-up is a dual-screen environment, where you can keep the main organizational guts of the application -the File Manager, Project Pane, Adjustment and Metadata panels - on a secondary screen off to one side, and have the image on which you are working maximized on the primary display directly in front of you.
There are three primary interface layouts: Browser Only, Viewer Only and Browser &Viewer. Browser &Viewer is the default one and you can cycle through all three modes by tapping  , or selecting them from the drop-down view menu on the Toolbar (Fig. 2.26).
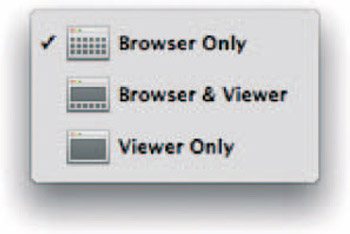
Browser Only uses all of the space to the right of the Projects pane to browse images in any selected folders. Albums or Projects. It's primarily used forgetting an overview of the images in use, and not for editing, because the images will usually be rendered too small for you to see what you're doing without using the Loupe or increasing the magnification, which negates the benefit of being able to see more files in one place.
Once you have identified the image with which you want to work, you should maximize the viewer to give your chosen image prominence as you make your adjustments.