Digital Circuit Analysis and Design with Simulink Modeling and Introduction to CPLDs and FPGAs, Second Edition
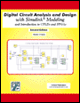
Appendix A: Introduction to MATLAB

This appendix is an introduction of the basic MATLAB commands and functions, procedures for naming and saving the user generated files, comment lines, access to MATLAB s Editor/ Debugger, finding the roots of a polynomial, and making plots. Several examples are provided with detailed explanations.

A.1 Command Window

To distinguish the screen displays from the user commands, important terms and MATLAB functions, we will use the following conventions:

Click: Click the left button of the mouse

Courier Font: Screen displays

Helvetica Font: User inputs at MATLAB s command window prompt EDU>> [*]

Helvetica Bold: MATLAB functions

Bold Italic: Important terms and facts, notes, and file names

When we first start MATLAB, we see the toolbar on top of the command screen and the prompt EDU>>. This prompt is displayed also after execution of a command; MATLAB now waits for a new command from the user. We can use the Editor/Debugger to write our program, save it, and return to the command screen to execute the program as explained below.

To use the Editor/Debugger:

  1. From the File menu on the toolbar, we choose New and click on M-File. This takes us to the Editor Window where we can type our script (list of statements) for a new file, or open a previously saved file. We must save our program with a file name which starts with a letter. Important! MATLAB is case sensitive, that is, it distinguishes between upper- and lower-case letters. Thus, t and T are two different...

UNLIMITED FREE
ACCESS
TO THE WORLD'S BEST IDEAS

SUBMIT
Already a GlobalSpec user? Log in.

This is embarrasing...

An error occurred while processing the form. Please try again in a few minutes.

Customize Your GlobalSpec Experience

Category: Touch Screen Displays
Finish!
Privacy Policy

This is embarrasing...

An error occurred while processing the form. Please try again in a few minutes.