Applied SolidWorks
Providing step-by-step instructions along with numerous illustrations, this book begins at a very basic level and ends at a fairly advanced level so that users can learn Solidworks on their own with little or no outside help.
Create a simple sketch using the Sketch commands
Dimension a sketch using the Smart Dimension command
Extrude a sketch using the Extrude command
Create a hole using the Extrude command
Create a fillet using the Fillet command
Create a counter bore using the Hole Wizard
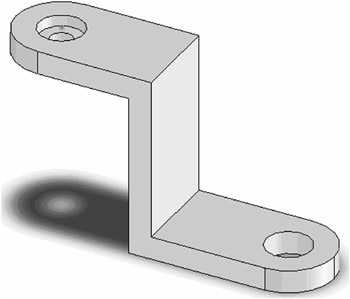
Chapter 1 includes instruction on how to design the part shown below.
Start SolidWorks by moving the cursor to the ![]() button in the lower left corner of the screen. Click the left mouse button once.
button in the lower left corner of the screen. Click the left mouse button once.
A pop up menu of the programs that are installed on the computer will appear. Scroll through the list of programs until you find SolidWorks .
Move the cursor over the text SolidWorks and left click once as shown in Figure 1.
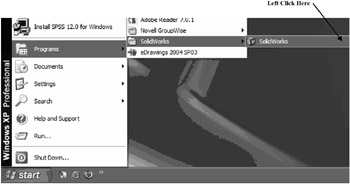
Figure 1
SolidWorks will open (load up and begin running).
Move the cursor to the upper left corner of the screen and left click on the New Document icon as shown in Figure 2.

Figure 2
The New SolidWorks Document dialog box will appear. Left click on Part as shown in Figure 3.
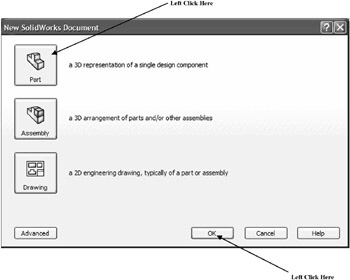
Figure 3
Left click on OK.
The screen should look similar to Figure 4.
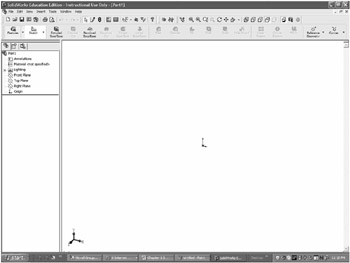
Figure 4
Move the cursor to the upper middle portion of the screen and left click on the Sketch icon. SolidWorks will display three different work planes. Move the cursor over the Front Plane until it turns red. Left click once as shown in...