Applied SolidWorks
Providing step-by-step instructions along with numerous illustrations, this book begins at a very basic level and ends at a fairly advanced level so that users can learn Solidworks on their own with little or no outside help.
SolidWorks is now ready for use. Left click on Line as shown in Figure 7.

Figure 7
Move the cursor in the lower left portion of the screen and left click once. This will be the beginning end point of a line as shown in Figure 8.
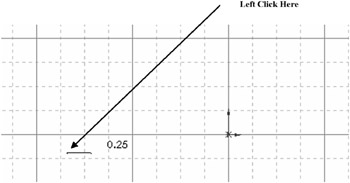
Figure 8
Move the cursor towards the lower right portion of the screen and left click once as shown in Figure 9.
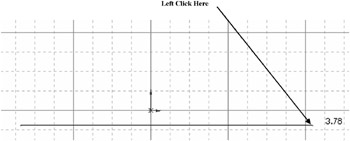
Figure 9
While the line is still attached to the cursor, move the cursor towards the top of the screen and left click once. Notice the length of the line is attached to the cursor at the right as shown in Figure 10.
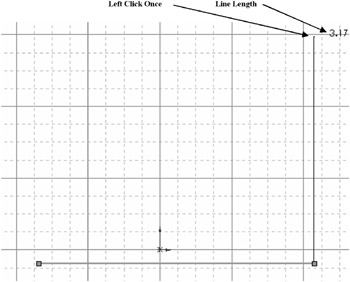
Figure 10
With the line still attached to the cursor, move the cursor towards the left side of the screen. Notice the line of small dots connecting the first and last point together. Left click once when the small dots appear as shown in Figure 11.
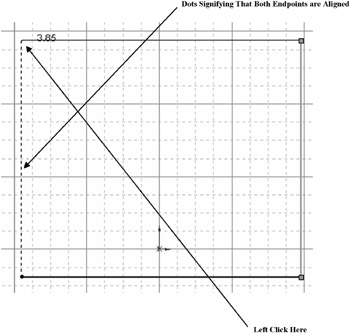
Figure 11
Your screen should look similar to Figure 12.
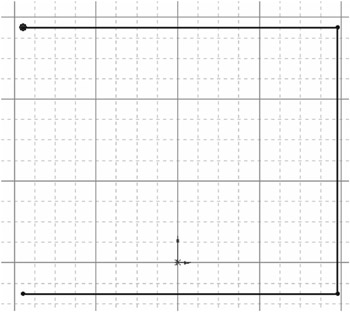
Figure 12
Move the cursor down towards the original starting point. Ensure that a red dot appears at the intersection of the two lines. This indicates that SolidWorks has snapped to the intersection of the lines. After the red dot appears, left click once. This will form a 90 degree box as shown in Figure 13.
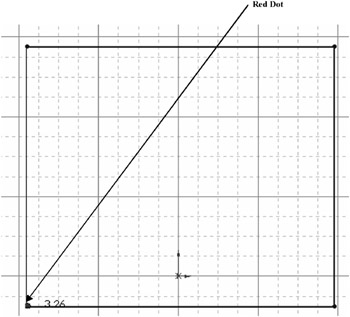
Figure 13
Your screen should look similar to Figure...