Applied SolidWorks
Providing step-by-step instructions along with numerous illustrations, this book begins at a very basic level and ends at a fairly advanced level so that users can learn Solidworks on their own with little or no outside help.
SolidWorks is now out of the Sketch commands and into the Features commands. Notice that the commands at the top of the screen are now different. Your screen should look similar to Figure 127.
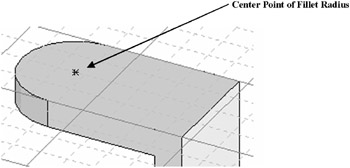
Figure 127
Right click anywhere around the part. A pop up menu will appear. Left click on Exit Sketch as shown in Figure 128.
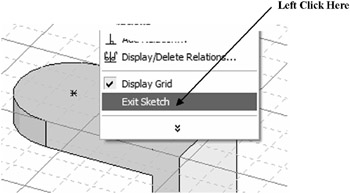
Figure 128
Move the cursor to the upper left portion of the screen and left click on Hole Wizard as shown in Figure 129.
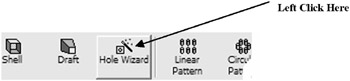
Figure 129
The Hole Definition dialog box will appear. Enter .25 for Hole Fit and Diameter, .500 for C Bore Diameter and .125 for the C Bore Depth as shown in Figure 130.
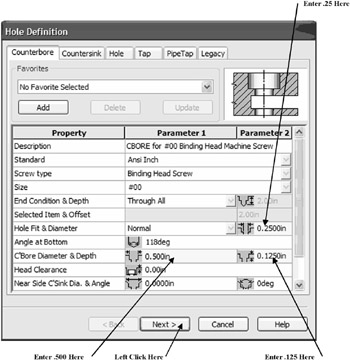
Figure 130
Left Click on Next as shown in Figure 130.
The Hole Placement dialog box will appear. Move the cursor to the center point of the fillet radius and left click once as shown in Figure 131.
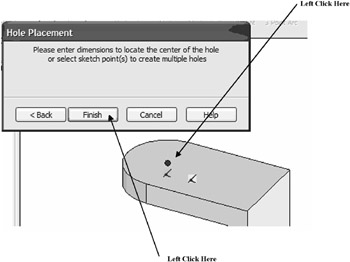
Figure 131
Left click on Finish.
Your screen should look similar to Figure 132.
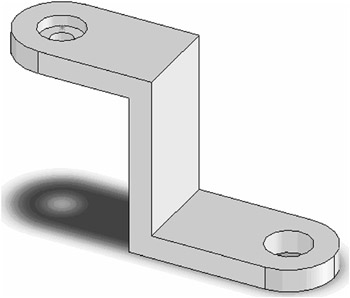
Figure 132
To ensure that the hole is correct move the cursor to the top portion of the screen and left click on the Rotate icon as shown in Figure 133.

Figure 133
Left click anywhere around the part and hold the left mouse button down. Drag the cursor upward. The part will rotate upward as shown in Figure 134.