Applied SolidWorks
Providing step-by-step instructions along with numerous illustrations, this book begins at a very basic level and ends at a fairly advanced level so that users can learn Solidworks on their own with little or no outside help.
Move the cursor to the upper left portion of the screen and left click on Smart Dimension as shown in Figure 17.

Figure 17
Move the cursor over the bottom horizontal line until it turns red as shown in Figure 18. Select the line by left clicking anywhere on the line or on each of the end points. To use the end points of the line, move the cursor over one of the end points. A small red dot will appear. Left click once and move the cursor to the other end point. After the red dot appears, left click once. The dimension will be attached to the cursor.
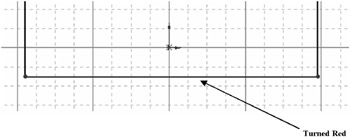
Figure 18
Move the cursor down to where the dimension will be placed and left click once as shown in Figure 19.
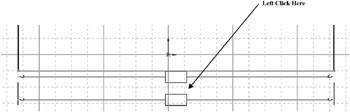
Figure 19
The Modify dialog box will appear as shown in Figure 20.
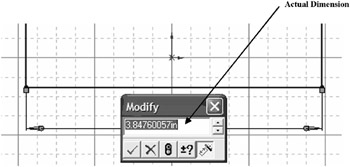
Figure 20
To edit the dimension, type 2.00 in the Modify dialog box (while the current dimension is highlighted) and left click on the green checkmark as shown in Figure 21.
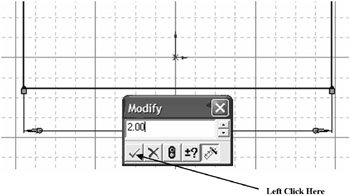
Figure 21
The dimension of the line will become 2.00 inches as shown in Figure 22.
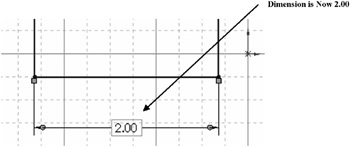
Figure 22
Move the cursor over the right side vertical line until it turns red as shown in Figure 23. Left click once.
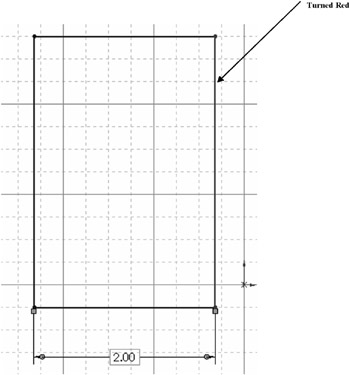
Figure 23
Move the cursor to where the dimension will be placed and left click once as...