Applied SolidWorks
Providing step-by-step instructions along with numerous illustrations, this book begins at a very basic level and ends at a fairly advanced level so that users can learn Solidworks on their own with little or no outside help.
Create an Auxiliary View using the Auxiliary View command
Dimension views using the Smart Dimension command
Create a Section View using the Section View command
Create Text using the Note command
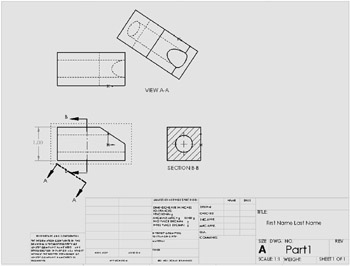
Chapter 4 includes instruction on how to create the drawings shown below.
Start SolidWorks by referring to Chapter 1 Getting Started .
After SolidWorks is running, open the .SLDDRW file that was created in Chapter 3. Move the cursor to the upper left corner of the screen and left click on Open icon as shown in Figure 1.

Figure 1
The Open dialog box will appear. Left click on the drawing that was created in Chapter 3 as shown in Figure 2.
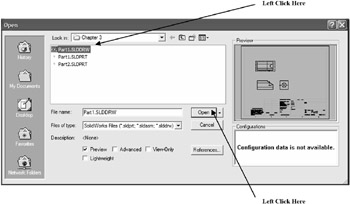
Figure 2
Left Click on Open.
After the .SLDDRW file is open, move the views closer to each other to provide additional room on the drawing. Start by moving the cursor over the top view. Dots will appear around the view. Left click (holding the left mouse button down) on the dots and drag the view down closer to the front view as shown in Figure 3.
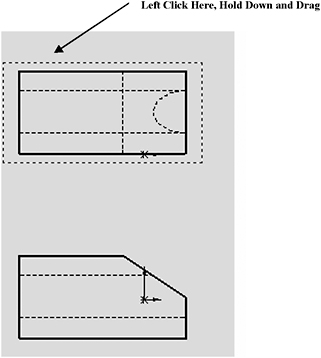
Figure 3
Move the side view closer to the front view. Start by moving the cursor over the side view. Dots will appear around the view. Left click (holding the left mouse button down) on the dots and drag the view closer to the front view as shown in Figure 4.

Figure 4