Animating with Microstation
For architects and engineers who deal with 3D rendering and animations, this text covers every aspect of animating in detail, including cameras, paths, actors, motion blurs, global and source lighting, and targets.
If you are new to animation and are using MicroStation V8 XM Edition, you can skip this exercise and move to the exercises specifically for MicroStation V8 XM Edition. In this exercise you will place an animation camera and then use the Define Actor Path tool to attach the camera to a B-spline path.
| Note | MicroStation has built-in Target and Camera actors that can be placed and named. You can have multiple targets and cameras in a design file, but there can only be one camera and target on at any given time. As an option, you can have MicroStation interpolate between two cameras to gradually transition from what one camera sees to what the other one sees even if both are in motion. |
Open the design file Longbeach.dgn.
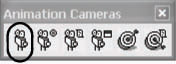
![]() From the Animation Cameras toolbox, select the Create Animation Camera tool.
From the Animation Cameras toolbox, select the Create Animation Camera tool.
The Create Animation Camera tool settings window opens.
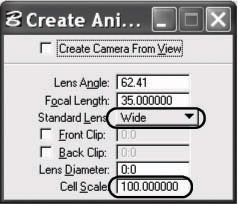
Set Cell Scale to 100 and Standard Lens to Wide to make it easier to see the camera cell graphic.
Turn on AccuDraw if it is not already on.
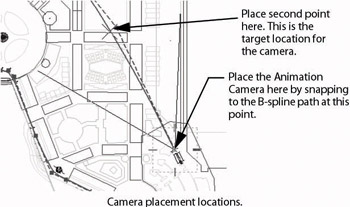
![]() Working in View 1, snap to the B-spline curve at the end of the Bspline path to the right side in View 1. Move the pointer to a point along the B-spline at the second pole and enter a data point.
Working in View 1, snap to the B-spline curve at the end of the Bspline path to the right side in View 1. Move the pointer to a point along the B-spline at the second pole and enter a data point.
The Create Camera dialog box opens.

In the Name field enter Main Camera, and enter Flying Camera