Mastering AutoCAD Civil 3D 2008

Full of advanced techniques and insider tips, this tutorial-based guide will help you understand concepts, create perfect designs, and manage every stage of the project.
 TABLE OF CONTENTS
 In Chapter 11, you built several simple corridors and began to see the dynamic power of the corridor model. While the focus of Chapter 11 was to get things started, it is unrealistic to think that a project would only have one road in the middle of nowhere with no intersections, no adjustments, and no complications. You may be having trouble visualizing how you will build a corridor to tackle your more complex design projects, such as the one pictured in Figure 12.1.
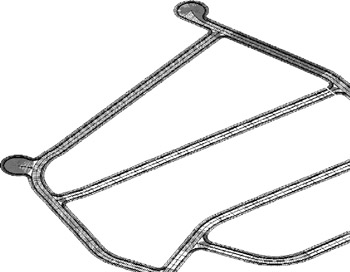
This chapter will focus on taking your corridor-modeling skills to a new level by introducing more tools to your corridor-building toolbox, such as intersecting roads, cul-de-sacs, advanced techniques, and troubleshooting. Keep in mind that this is only the beginning. There are so many ways to manipulate your assemblies, alignments, profiles, and the corridor itself to model anything you can imagine.
This chapter assumes that you have a worked through the examples in the alignments, profiles, profile view, assemblies and basic corridor chapters. Without a strong knowledge of the foundation skills, many of the tasks in this chapter may prove to be difficult.
By the end of this chapter, you will be able to:
Add a baseline to a corridor model for a cul-de-sac
Add alignment and profile targets to a region for a cul-de-sac
Use the interactive boundary tool to add a boundary to the corridor surface
When working on live...