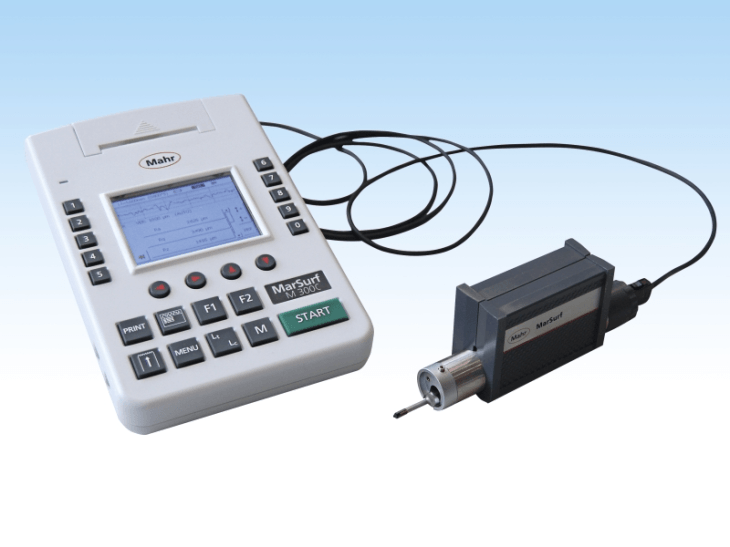
Surface Profilometers Information
 Surface profilometers are used to measure surface profiles, roughness, waviness, and other finish parameters. They are similar to form gages, inspection tools that are also used to measure surface profiles, roughness, waviness, and other finish parameters. There are two basic surface profilometer technologies: contact and non-contact. Contact, or stylus-based, surface profilometers measure surface texture by dragging a sharp, pointed tool across the surface. Height variations of the tip are recorded and then used to form a texture profile. Roughness and waviness are also calculated from the surface profile data. Non-contact surface profilometers measure the surface texture by optically scanning a surface with a light or laser. Optical, or light-based, instruments may also use triangulation, or interferometry, to measure or capture a surface profile. Although most surface profilometers provide only a two-dimensional (2-D) or line file, some instruments can provide three-dimensional (3-D) or areal topography measurements.
Features
Surface profilometers differ in terms of measurement capabilities and common specific parameters. Choices for measurement capabilities include:
- roughness, spacing, waviness, and hybrid parameters
- automatic defect classification (ADC)
- flatness, thickness, and step height
- lay or pattern
- warp or bow
There are many common specific parameters for surface profilometers. Examples include:
- roughness average
- mean peak-to-valley height
- base roughness depth
- maximum peak height
- average peak profile height
- maximum valley depth
- total roughness height
- profile depth
- maximum roughness depth
- ten-point height
- skewness
- kurtosis
- waviness average
- waviness height
- peak count
- peak spacing average
- core roughness depth
- bearing ratio
- slope
There are two different slope measurements: Slope Ra and Slope Rq. Slope Ra, or Delta a, is a measure of the slope of the average profile within the sample length. Slope Rq, or Delta Rq, is a measure of the root mean square (RMS) slope of the profile within the sample length.
Specifications
Selecting surface profilometers requires an analysis of performance specifications such as vertical range, vertical resolution, lateral range, lateral resolution, scan or transverse length, scan rate, and part diameter or width. Vertical range is the range of surface textures or peak-to-valley distances or heights that surface profilometers can measure. Vertical resolution is the minimum profile-height resolution that a surface profilometer can attain. Lateral range is the spatial or linear range the instrument can measure across the sample or surface. For surface profilometers that measure surface roughness, this is parallel to the surface of the part. Lateral resolution is the minimum attainable profile peak, valley, or spacing resolution. Scan or transverse length is the full distance, optically scanned or over which the stylus is drawn, for a data collection operation. Scan rate is the speed required to optically scan or drag a stylus over the transverse length during the collection of profile data.
Image credit:
- 2D / Line Profile
- 3D / Areal Topography
- ASME
- Aerospace / Defense
- Automotive
- Benchtop
- Coatings (Thin Films, Plating, etc.)
- Computer Interface / Networkable
- Contact / Stylus Based
- DIN
- Defects / ADC
- Digital Readout
- Displays / FPD
- Electronics
- Factory / Production Use
- Flatness
- Floor / Free Standing
- Handheld / Portable
- ISO / EN
- JIS
- MEMS
- Machine Mounted
- Mean Peak to Valley Height (Rtm, Rz)
- Mechanical Parts (Bearings, Shafting)
- Medical
- Non-contact - Optical / Laser
- Optics / Photonics
- Precision Machining / Grinding
- Roughness Average (Ra)
- Roughness Parameters (Ra, RMS / Rq, Rz, etc.)
- Roughness - RMS (Rq)
- SPC / Software Capability
- Semiconductor Manufacturing
- Step Height
- Thickness
- Total Roughness Height (Rt, PV)
- Warp / Bow
- Wear / Tribology
- roughness measurement
- surface roughness
- instrument to measure humidity
- stylus measurement
- flatness measurement
- surface waviness
- 3D instrument
- device to measure humidity
- laser profilometer
- optical cylinder profilometer
- ra surface finish gage
- RSK surface finish
- RTM machine
- surface texture gage
- surface texture measurement
- surface topography
- waviness gage
- 2D profilometer
- 3D album cs
- 3D model scissor
- 3D profilometer
- 3D surface measurement
- avery surface cleaner
- contour gauge
- EDM surface texture
- handheld profilometer
- parallelism measurement
- peak reading voltmeter
- precision surface measurement
- pt surface finish measurement
