How to Cheat in 3ds Max 2009: Get Spectacular Results Fast

Applying a Decal

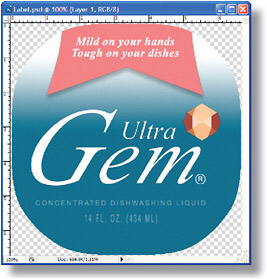
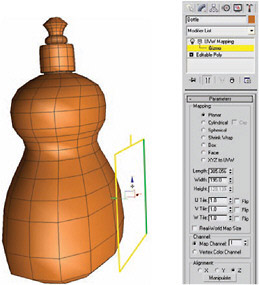
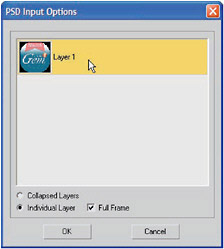
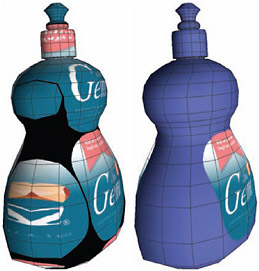
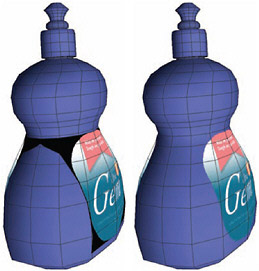
Applying a map in a single spot on the model is a common need in 3D presentation. Instead of applying multiple materials, you can create a decal by using a PSD texture map with a transparent background.


Figure 1: Prepare the decal bitmap in Photoshop with a transparent background, and save it as a PSD file. This automatically stores the transparency information as an alpha channel that you can use in 3ds Max.

Figure 2: Apply a UVW Map modifier to the object, and leave the Mapping as Planar. Highlight the Gizmo listing at the UVW Mapping modifier sub-object level, and move and scale the gizmo so it roughly matches the desired decal size.

Figure 3: In the Material Editor, assign the PSD file as a Diffuse bitmap. Choose the Individual Layer option and pick the single layer available. Using this option, rather than Collapsed Layers, preserves the alpha channel.

Figure 4: Assign the material to the object, and turn on Show Standard Map in Viewport. The decal appears all over the object. In the Coordinates rollout, turn off the Tile option for both U and V to remove the decal from all parts of the object except the area designated by the UVW Map gizmo.

Figure 5: In the Bitmap Parameters rollout, make sure Alpha Source is set to Image Alpha. This utilizes the alpha channel and makes the corners of the decal transparent. If your decal corners are black, choose the bitmap again. Take care...

UNLIMITED FREE
ACCESS
TO THE WORLD'S BEST IDEAS

SUBMIT
Already a GlobalSpec user? Log in.

This is embarrasing...

An error occurred while processing the form. Please try again in a few minutes.

Customize Your GlobalSpec Experience

Category: Graphics Software
Finish!
Privacy Policy

This is embarrasing...

An error occurred while processing the form. Please try again in a few minutes.