Photoshop CS A to Z: The Essential Visual Reference Guide
Designed to present the program in a visual way and in a logical order, this helpful, concise guide presents handy tips and useful quick keys that make Photoshop CS work for you.
| QUICK KEY | E |

Introduced on Photoshop 5.5, this tool, found in the Eraser compartment of the toolbox, is used to make pixels transparent. Click on the area you want to lose and the pixels disappear.
The palette has a number of options including the pacity and Tolerance levels along with on/off options for anti-aliasing, Use all Layers and Contiguous modes.
Anti-aliasing makes some of the edge pixels semi-transparent to ensure edges of unremoved details are smooth for natural cutouts. Using All Layers mode makes pixels in every layer to be considered by the Eraser. Contiguous mode ensures just the pixels connected to the sampled color are selected. When turned off, any pixels with a similar value within the image are selected.
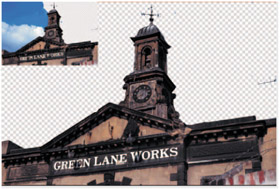
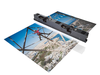
All this image needed was six clicks in various parts of the sky to completely remove it. When pasted onto another background it will show through in all the areas of transparency.
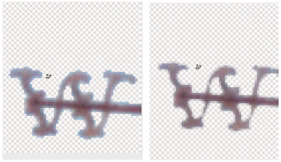
Turning Anti-aliasing on (right) ensures that edge pixels appear softer which, in turn, makes the cutout look more natural.
| QUICK KEY | W |
Click on the image using this tool to select an area that has the same brightness. If for instance your subject has a blue background that you want to change to green, click anywhere on the blue and you'll see the Magic Wand create a selection around all the pixels that have a similar color and brightness level. Adjust the Tolerance setting to increase or decrease...