Photoshop CS A to Z: The Essential Visual Reference Guide
Designed to present the program in a visual way and in a logical order, this helpful, concise guide presents handy tips and useful quick keys that make Photoshop CS work for you.
| MENU | FILE ? |
| PAGE SETUP | |
| QUICK KEYS | SHIFT+CTRL+P |
This takes you to your printer's settings where you select the paper size and orientation.
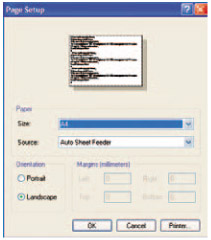
The depth of settings you see depends on the Operating System and print driver software. Clicking on the printer button takes you to the printer's driver and from here you can access properties and set paper type, size, resolution and a whole many more options.
| QUICK KEY | G |
Use this to flood the selected area with the foreground color.
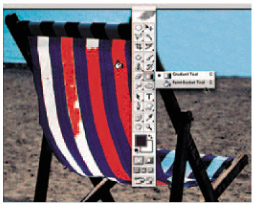
The Tolerance setting determines how many pixels are affected by the flood. A small amount results in a patchy paint effect, while a higher tolerance may color areas you don't want covered. The deckchair stripes, above, show the Tolerance at four settings. The left-hand one was set to 10, the second 20, the third 30 and the fourth 40. Click on Anti-aliased to soften the edge of the paint fill.
| QUICK KEY | B |
One of three tools used to apply selected color to the image. The paintbrush can be used on full strength or less using the opacity setting to reduce the amount of color affecting the image.
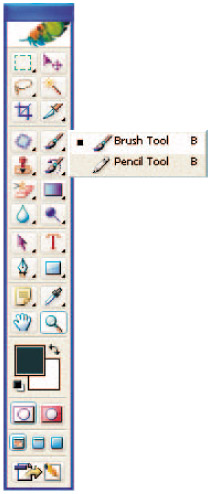
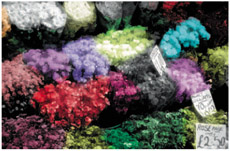
With lower opacity the original pixel color can still be seen. This effect is like adding a wash to the image and is really useful for hand-coloring black & white images like the example below.
The menu boxes that let you adjust settings of various tools.
Arrange them carefully...